


Table of contents
- What is a Kubernetes Cluster?
- Master Node Functions:
- Worker Node Components:
- Understanding Kubelet and Kubectl
- Kubelet: The Silent Guardian of Containers
- Purpose of Kubelet:
- Command Insight:
- Kubectl: Your Kubernetes Control Panel
- Purpose of Kubectl:
- Command Insight:
- Getting Hands-On: Kubernetes Installation on CentOS 7
- Project Dependency Alert:
- Chapter 1: Installing containerd for Kubernetes.
- Chapter 2: Installing Kubernetes on CentOS 7
- Chapter 3: Deploying and Initializing the Kubernetes Cluster
- Troubleshooting Kubernetes Cluster Initialization Issues
- Troubleshooting Flannel Pod Issues in Kubernetes Cluster
- Frequently Asked Questions (FAQ)
- Project Dependencies
- Conclusion
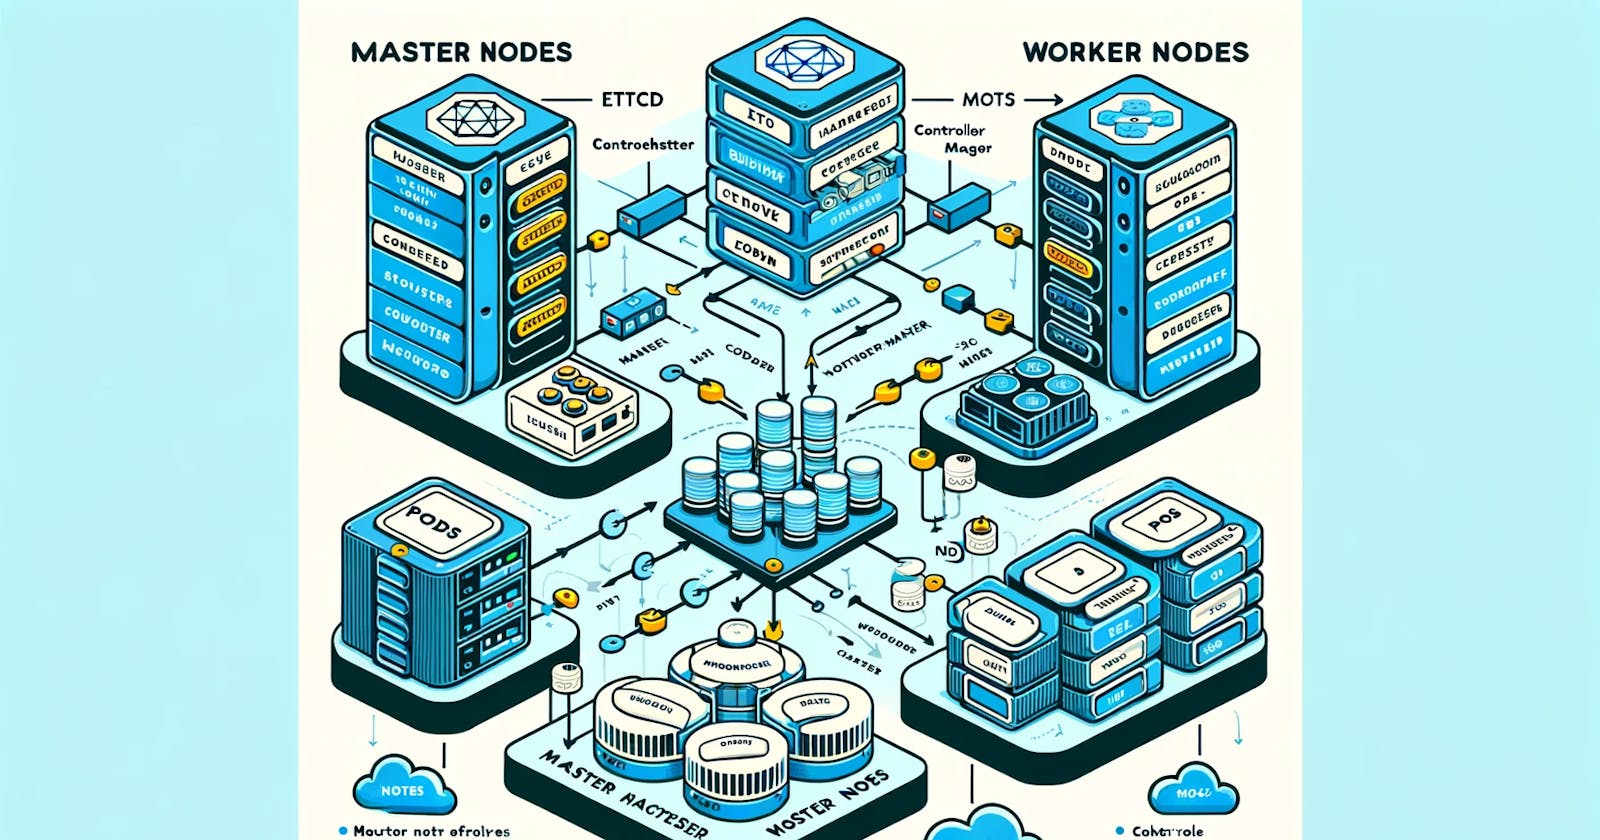
What is a Kubernetes Cluster?
A Kubernetes cluster is the backbone of container orchestration, comprising at least two nodes: one master and one worker. The master oversees administrative tasks, while worker nodes host pods running user applications.
Master Node Functions:
- Administration Hub: Manages scheduling, cluster state, pod replacement, and workload distribution.
Worker Node Components:
kube-proxy: A network proxy ensuring efficient communication among all cluster pods.
kubelet: The pod manager, initiating, maintaining, and reporting pod states to the master.
Container Runtime: Responsible for spinning up containers and facilitating OS interaction.

Understanding Kubelet and Kubectl
Kubelet: The Silent Guardian of Containers
At the heart of Kubernetes lies Kubelet, a server that plays a pivotal role in running K8 processes and facilitates communication with the API server. In simpler terms, Kubelet is your server's silent guardian, ensuring seamless operation and coordination within the Kubernetes cluster.
Purpose of Kubelet:
Pod Management: Kubelet is responsible for initiating and maintaining pods, the fundamental units of deployment in Kubernetes.
Liaison with API: Acting as a bridge to the Kubernetes API server, Kubelet enables the exchange of information vital for cluster functionality.
Command Insight:
kubelet -- start-pod <pod_name>
This command initiates the deployment of a pod named <pod_name>, showcasing Kubelet's role in pod management.
Kubectl: Your Kubernetes Control Panel
From a user's perspective, Kubectl is the control panel for Kubernetes, empowering you to execute all operations seamlessly. Technically, it operates as a client, facilitating access to the Kubernetes API server.
Purpose of Kubectl:
Operational Hub: Kubectl serves as the centralized hub for executing diverse Kubernetes operations, simplifying cluster management tasks.
API Interaction: It acts as a user-friendly interface for interacting with the Kubernetes API, abstracting complex backend processes.
Command Insight:
kubectl get pods
This command retrieves information about all running pods, showcasing Kubectl's capability to fetch real-time data from the Kubernetes cluster.
Getting Hands-On: Kubernetes Installation on CentOS 7
Follow our step-by-step tutorial to install Kubernetes on a CentOS 7 system, ensuring a smooth transition into the world of container orchestration.
Project Dependency Alert:
As of Kubernetes version 1.24, Docker has been deprecated, making it advisable to use containerd or CRI-O as runtimes. For Docker enthusiasts, cri-dockerd bridges Docker with Kubernetes Container Runtime Interface (CRI).
Before setting up a Kubernetes cluster, ensure that you have the following prerequisites:
System Requirements:
Master Node:
A dedicated machine to act as the Kubernetes master node.
Adequate CPU and memory resources.
CentOS 7 operating system.
Worker Node(s):
One or more dedicated machines to act as Kubernetes worker nodes.
Adequate CPU and memory resources.
CentOS 7 operating system.
Software Requirements:
containerd:
Container runtime required for Kubernetes (Docker is deprecated as of Kubernetes version 1.24).
Installed and configured on both master and worker nodes.
Kubernetes Components:
kubelet: Manages pods on the node.
kubeadm: Used to initialize the cluster.
kubectl: The command-line tool for interacting with the cluster.
Installed on both master and worker nodes.
Network Configuration:
Module Loading:
overlayandbr_netfilterkernel modules loaded on all nodes.
Kernel Parameters:
- Network-related sysctl settings configured on all nodes.
Firewall Configuration:
- Firewall rules configured to allow communication between nodes on specific ports.
Iptables Settings:
- Iptables settings adjusted for proper packet processing.
SELinux and SWAP:
SELinux disabled or set to permissive mode.
SWAP disabled on all nodes.
Chapter 1: Installing containerd for Kubernetes.
1.1 Configure Prerequisites
Step 1: Load Required Modules
Before installing Kubernetes components, it's crucial to load the necessary modules and configure them to load at boot time.
  sudo modprobe overlay
  sudo modprobe br_netfilter
Explanation:
modprobe overlay: Loads the overlay kernel module, essential for containerd.modprobe br_netfilter: Loads the bridge netfilter module, required for networking
Step 2: Configure Module Loading
Create a configuration file to load modules at boot time.
  cat <<EOF | sudo tee /etc/modules-load.d/containerd.conf
  overlay
  br_netfilter
  EOF
Explanation:
- sysctl settings: Configure network-related settings.
Step 3: Set Up Other Prerequisites
Configure additional prerequisites without the need for a system restart.
  cat <<EOF | sudo tee /etc/sysctl.d/99-kubernetes-cri.conf
  net.bridge.bridge-nf-call-iptables = 1
  net.ipv4.ip_forward = 1
  net.bridge.bridge-nf-call-ip6tables = 1
  EOF
  sudo sysctl –system
Explanation:
tee: Writes to files.
modules-load.d/containerd.conf: Loads required modules at boot time.
sysctl.d/99-kubernetes-cri.conf: Sets up networking parameters.
1.2 Install containerd
Step 4: Add Docker Repository
Add the official Docker repository to access containerd.
sudo dnf config-manager --add-repo=https://download.docker.com/linux/centos/docker-ce.repoExplanation:
- dnf config-manager: Manages configuration.
Step 5: Update and Install
Update the system and install the containerd package.
  sudo dnf update
  sudo dnf install -y containerd
Explanation:
dnf update: Updates system packages.
dnf install: Installs containerd.
Step 6: Create Configuration File
Create a configuration file for containerd and set it as the default.
  sudo mkdir -p /etc/containerd
  sudo containerd config default | sudo tee /etc/containerd/config.toml
Explanation:
mkdir: Creates a directory.
containerd config default: Generates default configuration.
Step 7: Set cgroupdriver to systemd
Edit the containerd configuration file to set the cgroupdriver to systemd.
sudo vi /etc/containerd/config.tomlExplanation:
vi: Opens the text editor.
SystemdCgroup: Ensures compatibility with Kubernetes.
Find the following section:
[plugins."io.containerd.grpc.v1.cri".containerd.runtimes.runc.options]
Change the value of SystemdCgroup to true.
SystemdCgroup = true
Once you are done, match the section in your file to the following:
    [plugins."io.containerd.grpc.v1.cri".containerd.runtimes.runc.options]
                BinaryName = ""
                CriuImagePath = ""
                CriuPath = ""
                CriuWorkPath = ""
                IoGid = 0
                IoUid = 0
                NoNewKeyring = false
                NoPivotRoot = false
                Root = ""
                ShimCgroup = ""
                SystemdCgroup = true
Step 8: Restart containerd
Apply the changes made in the previous step by restarting containerd.
sudo systemctl restart containerdStep 9: Verify containerd Installation.
Ensure that containerd is running with the following command.
ps -ef | grep containerdExplanation:
ps -ef: Displays information about processes.
grep containerd: Filters the output for containerd.
If successfully running, the output should resemble:
root 63087 1 0 13:16 ? 00:00:00 /usr/bin/containerd
Chapter 2: Installing Kubernetes on CentOS 7
Section 1: Installing Dependencies
Step 1: Install curl
Before diving into Kubernetes installation, make sure to install the necessary dependencies, starting with curl.
sudo dnf install curlExplanation:
sudo dnf install: Installs the curl package.
curl: A command-line tool for transferring data.
Step 2: Configure Kubernetes Repository
As Kubernetes packages are not available from official CentOS 7 repositories, configure the Kubernetes repository. This step is crucial for both the Master Node and each Worker Node.
  cat <<EOF > /etc/yum.repos.d/kubernetes.repo
  [kubernetes]
  name=Kubernetes
  baseurl=https://packages.cloud.google.com/yum/repos/kubernetes-el7-x86_64
  enabled=1
  gpgcheck=1
  repo_gpgcheck=1
  gpgkey=https://packages.cloud.google.com/yum/doc/yum-key.gpg <https://packages.cloud.google.com/yum/doc/rpm-package-key.gpg>
  EOF
Explanation:
cat <<EOF >: Creates and writes to a file in one command.
yum.repos.d/kubernetes.repo: The repository configuration file for Kubernetes.
Section 2: Installing Kubernetes Components
Step 1: Install kubelet, kubeadm, and kubectl
The core Kubernetes components, kubelet, kubeadm, and kubectl, are essential for managing your cluster. Install these packages on each node.
  sudo yum install -y kubelet kubeadm kubectl
  systemctl enable kubelet
  systemctl start kubelet
Explanation:
sudo yum install: Installs the Kubernetes packages.
systemctl enable/start kubelet: Ensures kubelet starts on boot and is immediately started.
Step 2: Set Hostname on Nodes
Assign a unique hostname to each node using the following commands.
sudo hostnamectl set-hostname master-node&
  sudo hostnamectl set-hostname worker-node1
  sudo hostnamectl set-hostname worker-node2
  sudo hostnamectl set-hostname worker-node3
Explanation:
- sudo hostnamectl set-hostname: Sets the hostname for the node.
Step 3: Configure Firewall
Enable communication across the cluster by configuring firewalld and adding the necessary ports.
  sudo systemctl start firewalld  # Start firewalld if not running
  sudo firewall-cmd --permanent --add-port=6443/tcp
  sudo firewall-cmd --permanent --add-port=2379-2380/tcp
  sudo firewall-cmd --permanent --add-port=10250/tcp
  sudo firewall-cmd --permanent --add-port=10251/tcp
  sudo firewall-cmd --permanent --add-port=10252/tcp
  sudo firewall-cmd --permanent --add-port=10255/tcp
  sudo firewall-cmd --reload
Explanation:
- firewall-cmd --add-port: Adds ports to the firewall configuration.
Step 4: Update Iptables Settings
Adjust Iptables settings to ensure proper packet processing.
  cat <<EOF > /etc/sysctl.d/k8s.conf
  net.bridge.bridge-nf-call-ip6tables = 1
  net.bridge.bridge-nf-call-iptables = 1
  EOF
  sysctl --system
Explanation:
cat <<EOF >: Writes to a configuration file.
sysctl --system: Applies the sysctl settings.
Step 5: Disable SELinux
Disable SELinux to allow containers access to the host filesystem.
  sudo setenforce 0
  sudo sed -i 's/^SELINUX=enforcing$/SELINUX=permissive/' /etc/selinux/config
Explanation:
sudo setenforce: Sets SELinux mode.
sudo sed -i: Edits SELinux configuration file.
Step 6: Disable SWAP
Disable SWAP to enable proper kubelet functionality.
  sudo sed -i '/swap/d' /etc/fstab
  sudo swapoff -a
Explanation:
sudo sed -i: Edits the filesystem table configuration file.
sudo swapoff -a: Disables SWAP.
Chapter 3: Deploying and Initializing the Kubernetes Cluster
Section 1: Initializing the Cluster
Step 1: Deploying the Cluster
Execute the following command on the master node to initialize the Kubernetes cluster.
sudo kubeadm initExplanation:
- sudo kubeadm init: Initializes the Kubernetes control-plane on the master node.
Step 2: Post-Initialization Steps
After successful initialization, follow the provided instructions to set up your user configuration.
  mkdir -p $HOME/.kube
  sudo cp -i /etc/kubernetes/admin.conf $HOME/.kube/config
  sudo chown $(id -u):$(id -g) $HOME/.kube/config
Alternatively, for root users:
export KUBECONFIG=/etc/kubernetes/admin.confExplanation:
mkdir -p: Creates the directory for Kubernetes configuration.
sudo cp -i: Copies the admin configuration to the user's home directory.
sudo chown: Sets ownership of the configuration file.
Step 3: Deploying a Pod Network
Deploy a pod network to enable communication within the cluster.
kubectl apply -f <https://raw.githubusercontent.com/coreos/flannel/master/Documentation/kube-flannel.yml>Explanation:
- kubectl apply -f: Applies the Flannel pod network configuration.
Step 4: Verifying Master Node
Check if the master node is ready.
sudo kubectl get nodesExpect an output similar to:
  NAME          STATUS   ROLES             AGE   VERSION
  master-node   Ready    control-plane     2m50s v1.24.1
Also, ensure all pods are running correctly.
- kubectl get pods --all-namespaces
Step 5: Add Worker Node
Move to the worker node and run the previously saved
kubeadm joincommand from Step 3.kubeadm join 102.130.122.165:6443 --token uh9zuw.gy0m40a90sd4o3kl \\ --discovery-token-ca-cert-hash sha256:24490dd585768bc80eb9943432d6beadb3df40c9865e9cff03659943b57585b2Ensure the output indicates successful joining.
Step 6: Verify Worker Node Joining
Switch back to the master node and confirm the worker node's successful join.
kubectl get nodesSet the role for the worker node.
kubectl label node worker-node node-role.kubernetes.io/worker=workerVerify the role was set.
kubectl get nodes
Troubleshooting Kubernetes Cluster Initialization Issues
Problem 1: Checking if Containerd is Active
Symptom:
You are experiencing issues with your Kubernetes cluster and suspect that Containerd may not be active.
Solution:
Check Containerd Status: Run the following command to check if Containerd is active:
sudo systemctl status containerdEnsure that the service is active and running without errors.
Restart Containerd: If Containerd is not active, restart it using:
sudo systemctl restart containerdCheck Logs: Review the Containerd logs for any error messages:
journalctl -u containerdReinstall Containerd: If issues persist, consider reinstalling Containerd according to your system's package manager.
Problem 2: Port Already in Use Error During Cluster Initialization
Symptom:
When initializing the Kubernetes cluster, you encounter an error indicating that a port is already in use.
- Solution:
Identify Port in Use: Use the following command to identify the process using a specific port (replace
<port>with the actual port number causing the error):sudo lsof -i:<port>Stop Conflicting Process: If the port is in use by another process, stop or kill that process:
sudo kill -9 <PID>Retry Initialization: Once the conflicting process is stopped, retry initializing the Kubernetes cluster.
Problem 3: Identifying Processes Using ETCD Ports
Symptom:
You suspect that ETCD ports are being used by another process, causing issues.
Solution:
Check ETCD Ports: Identify the ports used by ETCD (default: 2379 and 2380).
Find Processes: Use the following command to find processes using a specific port (replace
<port>with the actual port number):sudo lsof -i:<port>Verify Process Information: Confirm if the listed processes are related to ETCD. You can use
ps -ef | grep <PID>to get detailed information about a specific process.Stop Conflicting Processes: If any processes unrelated to Kubernetes are using ETCD ports, stop or kill them.
Retry Initialization: Once conflicting processes are resolved, attempt to initialize the Kubernetes cluster again.
Troubleshooting Flannel Pod Issues in Kubernetes Cluster
Problem: Flannel Pod in CrashLoopBackOff State
Symptom:
The Flannel pod is in a CrashLoopBackOff state, and the logs indicate an error related to pod CIDR not being assigned to the worker node.
Solution:
Check Flannel Pod Logs: Run the following command to check the logs of the Flannel pod for the specific namespace:
kubectl logs <flannel-pod-name> -n <namespace>Identify Error Message: Look for the error message indicating "Error registering network: failed to acquire lease: node '<worker-node-name>' pod CIDR not assigned."
Update Worker Node CIDR: If the pod CIDR is not assigned to the worker node, update it using the following command:
kubectl patch node <worker-node-name> -p '{"spec":{"podCIDR":"<desired-pod-cidr>"}}'Replace
<worker-node-name>with the actual worker node name and<desired-pod-cidr>with the desired CIDR for pods on the worker node.Verify Flannel Pod Recovery: After updating the worker node CIDR, check if the Flannel pod for that worker node is running without issues.
kubectl get pods -n <namespace>Recreate Flannel Deployment (If Necessary): If the issue persists, delete the Flannel deployment and apply it again.
 kubectl delete -f pod-network-flannel.yml
 kubectl apply -f pod-network-flannel.yml
Verify CIDR Assignment: Ensure that the CIDR has been assigned to the worker node. Run the following command to check:
kubectl get nodes -o jsonpath='{.items[*].spec.podCIDR}'Check Node Status: Verify that the worker node has joined the cluster and is in the ready state.
kubectl get nodesVerify Flannel Pods: After updating the CIDR and ensuring the worker node is ready, check the status of Flannel pods:
kubectl get pods -n <namespace>Check Flannel Pod Logs (If Necessary): Review the logs of the Flannel pod again to ensure there are no new errors:
kubectl logs <flannel-pod-name> -n <namespace>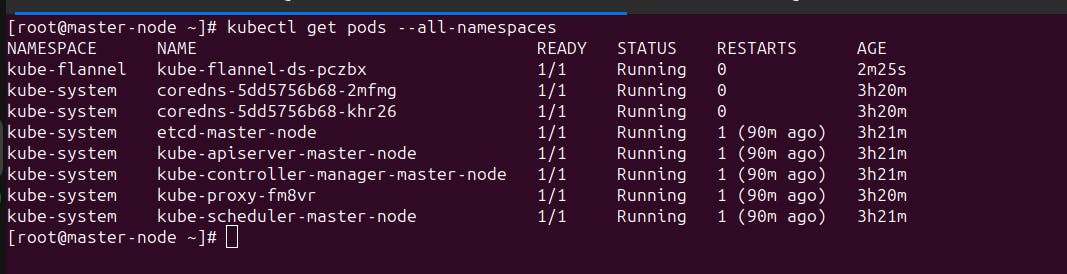

Additional Considerations:
Ensure network policies, if used, are configured correctly.
Confirm that the Kubernetes API server is accessible from both the control plane and worker nodes.
Frequently Asked Questions (FAQ)
Q: Why do we need to load specific kernel modules?
- A: These modules are crucial for containerd to function properly, providing necessary functionalities for container operations.
Q: What is the significance of setting cgroupdriver to systemd?
- A: Kubernetes relies on systemd as the cgroupdriver for effective container management.
Q: Why is disabling SELinux necessary?
- A: SELinux, in enforcing mode, may restrict container access to the host filesystem. Disabling it or setting it to permissive mode resolves this issue.
Q: What is the purpose of disabling SWAP?
- A: Kubernetes relies on memory management, and disabling SWAP ensures optimal performance and avoids potential issues.
Q: Why is Docker deprecated, and what alternative is recommended?
- A: As of Kubernetes version 1.24, Docker has been deprecated. It is advisable to use containerd or CRI-O as runtimes. For Docker enthusiasts, cri-dockerd bridges Docker with Kubernetes Container Runtime Interface (CRI).
Q: What is the purpose of configuring firewall and iptables settings?
- A: Configuring firewall and iptables settings ensures that nodes within the cluster can communicate with each other over specific ports, essential for Kubernetes operation.
Q: Why is the Flannel pod in a CrashLoopBackOff state after cluster initialization, and how can I resolve it?
- A: The Flannel pod might be facing issues with pod CIDR assignment. You can troubleshoot by checking the pod logs, updating the worker node CIDR, and verifying the Flannel pod's recovery. Refer to the troubleshooting section in the guide for detailed steps.
Q: Can I use a different pod network provider instead of Flannel, and how do I configure it?
- A: Yes, you can choose from different pod network providers such as Calico or CNI. To configure a different provider, replace the Flannel configuration with the desired provider's YAML file during the cluster initialization step.
Q: What is the purpose of the
kubeadm joincommand, and how do I add additional worker nodes to the cluster?- A: The
kubeadm joincommand is used to add worker nodes to the cluster. After initializing the master node, run thekubeadm joincommand on each worker node, as provided during the master node initialization process.
- A: The
Q: How can I scale my Kubernetes cluster by adding more worker nodes?
- A: Scaling the cluster involves adding more worker nodes. Follow the steps to initialize each new worker node using
kubeadm joinand ensure they join the existing cluster. Verify their status usingkubectl get nodes.
- A: Scaling the cluster involves adding more worker nodes. Follow the steps to initialize each new worker node using
Q: What considerations should be taken into account when choosing a container runtime like containerd or CRI-O?
- A: Consider factors such as community support, compatibility with Kubernetes, performance, and specific feature requirements. Both containerd and CRI-O are popular choices, and the decision may depend on your specific use case.
Q: How do I troubleshoot issues related to containerd on my Kubernetes nodes?
- A: If you encounter problems with containerd, check its status using
sudo systemctl status containerd. Review containerd logs usingjournalctl -u containerdfor error messages. Restart containerd if needed or consider reinstalling it using your system's package manager.
- A: If you encounter problems with containerd, check its status using
Q: What should I do if I face issues with the
kubeadm initcommand, and it fails to initialize the master node?- A: Check for error messages during the
kubeadm initprocess. Common issues include port conflicts or network problems. Refer to the troubleshooting section for solutions, such as identifying processes using specific ports and resolving conflicts.
- A: Check for error messages during the
Q: Can I use a different operating system for my Kubernetes nodes, or is CentOS 7 mandatory?
- A: While CentOS 7 is used in the provided guide, Kubernetes supports various operating systems. Ensure compatibility and follow the appropriate installation steps for the chosen operating system.
Q: Is it necessary to set up a pod network like Flannel, or can I use Kubernetes without it?
- A: A pod network is essential for enabling communication between pods in a Kubernetes cluster. While Flannel is one option, you can choose other pod network providers like Calico or CNI based on your requirements.
Q: How can I upgrade my Kubernetes cluster to a newer version?
- A: Upgrading a Kubernetes cluster involves updating components like kubelet, kubeadm, and kubectl on all nodes. Follow the Kubernetes documentation for the specific version you are upgrading to, and carefully execute the upgrade steps provided.
Project Dependencies
curl:
- Required for installing dependencies. Ensure it is installed on all nodes.
Kubernetes Repository:
- Configured on all nodes to access Kubernetes packages.
Flannel Pod Network:
- Deployed to enable communication within the cluster.
Conclusion
In conclusion, a Kubernetes cluster serves as the backbone of container orchestration, comprising master and worker nodes. The master node functions as the administrative hub, overseeing scheduling, cluster state, and workload distribution. On the other hand, worker nodes host pods running user applications, with components like kube-proxy, kubelet, and a container runtime facilitating efficient communication and pod management.
The silent guardian of Kubernetes, Kubelet, plays a pivotal role in running processes and communicating with the API server. Meanwhile, Kubectl acts as the control panel, allowing users to seamlessly execute various operations and interact with the Kubernetes API.
To bring Kubernetes to life, a step-by-step installation guide on CentOS 7 is provided, emphasizing prerequisites, software requirements, network configurations, and the deployment and initialization of the cluster. Notably, Docker is deprecated as of Kubernetes version 1.24, and alternatives like containerd or CRI-O are recommended.
The troubleshooting section addresses common issues during cluster initialization, containerd problems, and Flannel pod challenges, offering solutions to ensure a smooth and resilient Kubernetes environment. Frequently asked questions cover topics ranging from choosing container runtimes to scaling the cluster and upgrading Kubernetes versions.
In summary, this comprehensive guide equips users with the knowledge and steps required to understand, install, troubleshoot, and maintain a Kubernetes cluster, empowering them to harness the full potential of container orchestration in their environments.